Potrebujeme / We need:
- veľa papierových ruličiek / a lot of paper rolls (nájdete tu)
- silikónovú pištoľ / glue gun (stačí aj obyčajné lepidlo / or normal glue)
- dno košíka / bottom of basket (nájdete tu)
- štipce / pegs
- konečný lak / finish paint (ja používam DEKORLAK čerešňa - I use DEKORLAK cheery)

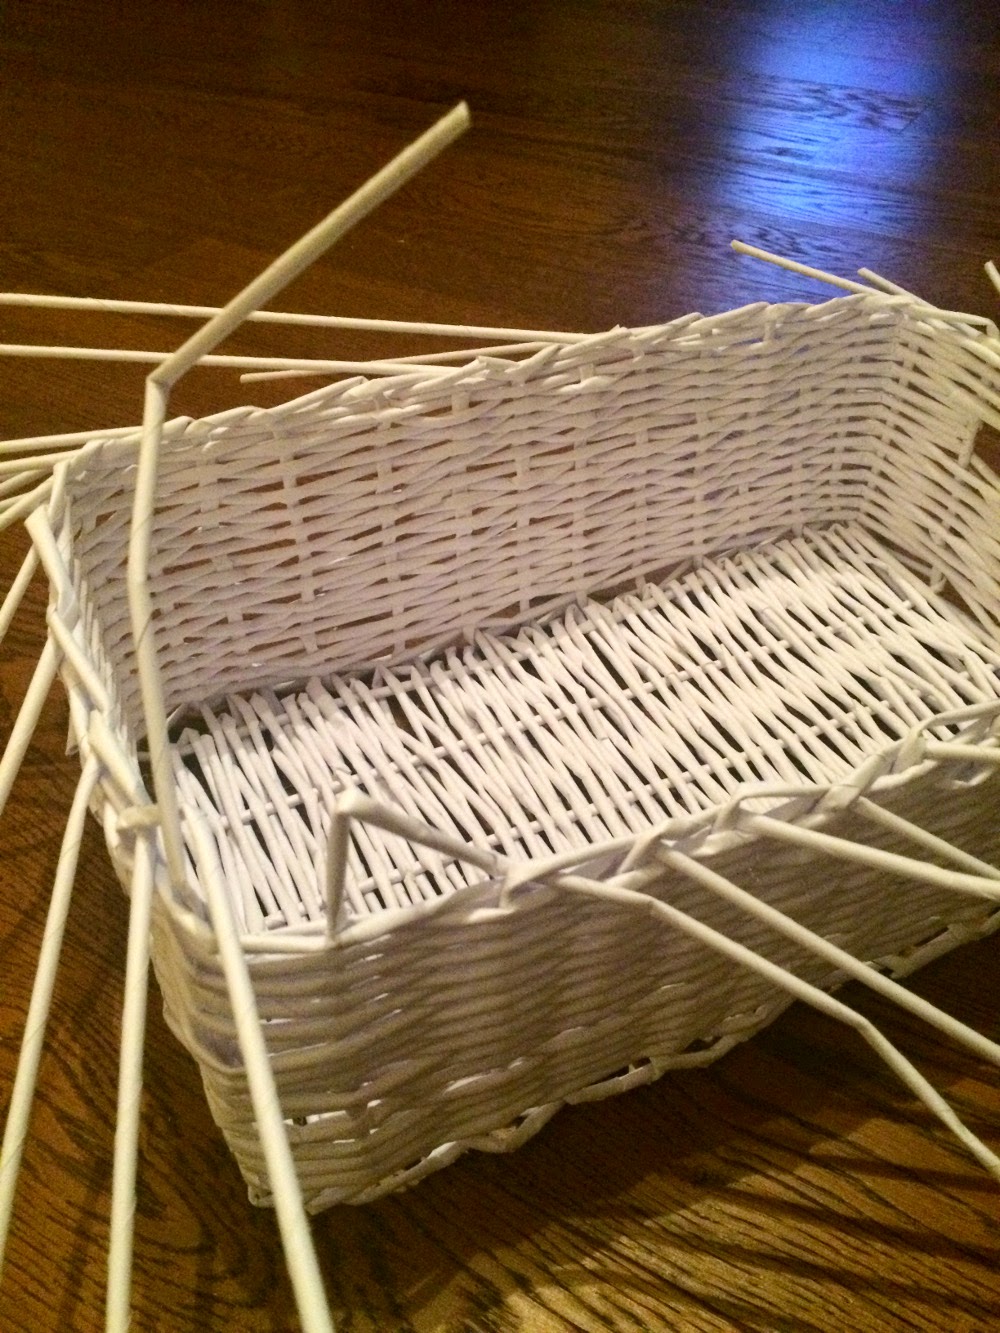
1.) Pokračujeme "ukončením" dna - rohovú ruličku (POZOR! nie tú s ktorou budeme pliesť) prevlečieme cez susednú ruličku a zaštipcujeme ju o krabicu
Continue "termination" bottom - corner roll (WARNING! Not the one with which we weave) threaded through neighbor a roll and pegs it on
Rolls, which we remained begin to knit (alternating top / bottom) and connects to the rolls themselves


3.) POZOR NA ROHY ! - pri rohoch sa nachádzajú z oboch strán ruličky (sú veľmi blízko seba). Pri nich nepletieme striedavo, ale cez obe prejdeme buď zhora alebo zdola
WARNING CORNERS! - At the corners are located on both sides of rolls (they are very close to each other). For them don not knitting alternate, but we go through both either above or below
4.) Pokračujeme v pletení
Continue in knitting


5.) Ja som si urobila aj úchytky - urobíte ich takto: vo výške, ktorej chceme mať úchytky (na bočných stranách v strede) si prilepíme o jednu ruličku tú ruličku, ktorou pletieme. Vynecháme ešte 1 ruličku a na ďalšiu začneme pliesť novou. A takto to opakujem z oboch strán. Ja som takto vynechala 6 riadkov. Ruličky Vám síce budú trčať, no to upravíme neskôr
I ´ve done the handles - they do the following: of which we have tabs (on the sides in the middle) to paste on one roll of a roll around which the skin. Skip even a roll of 1 and the next begin to knit a new one. And so I repeat on both sides. I missed the following 6 lines. Rolls while you are stuck, but it will adjust later

6.) Keď máme upletený košík v požadovanej výške prestávame pliesť a vyberieme košík podľa, ktorého sme plietli.
When we knitted basket claimed, we stop to knit and choose basket by which we are braided.

7.) Ruličku, ktorou sme plietli sa dostaneme ku začiatku (tam kde sme s ňou začali pliesť) a zalepíme ju dovnútra
Roll, which we braided to get to the beginning (where we started to knit with it) and glue it inside


8.) Pokračujeme tak, že 1. ruličku zastrčíme za 2. ruličku (ako na obrázku)
Continues with the first roll of a roll tucked under 2 (as shown)
 9.) Keď je to takto hotové tak 1. ruličku prestrčíme cez každú 2. medzeru (ako na obrázku)
When this is done as follows 1. roll inserted through each second gap (as shown)

 10.) Ruličky začneme odstrihovať
Start cutting the rolls


11.) Teraz sa vrátime k úchytkom, ktoré tak isto odstrihneme
Now we return to the handle, which also cutoff

KOŠÍK JE HOTOVÝ :)
BASKET IS DONE :)
Najlepšie je ho ešte nafarbiť moridlom alebo iným lakom (ja som použila DEKORLAK - čerešňa)
The best is paint it with stain or other varnish (I use DEKORLAK - cherry)
Taktiež som si ušila aj látku do košíka, ktorú nájdete TU
I Also sewed the cloth to basket, which can be found HERE


5.) Ja som si urobila aj úchytky - urobíte ich takto: vo výške, ktorej chceme mať úchytky (na bočných stranách v strede) si prilepíme o jednu ruličku tú ruličku, ktorou pletieme. Vynecháme ešte 1 ruličku a na ďalšiu začneme pliesť novou. A takto to opakujem z oboch strán. Ja som takto vynechala 6 riadkov. Ruličky Vám síce budú trčať, no to upravíme neskôr
I ´ve done the handles - they do the following: of which we have tabs (on the sides in the middle) to paste on one roll of a roll around which the skin. Skip even a roll of 1 and the next begin to knit a new one. And so I repeat on both sides. I missed the following 6 lines. Rolls while you are stuck, but it will adjust later
.JPG)

6.) Keď máme upletený košík v požadovanej výške prestávame pliesť a vyberieme košík podľa, ktorého sme plietli.
When we knitted basket claimed, we stop to knit and choose basket by which we are braided.
7.) Ruličku, ktorou sme plietli sa dostaneme ku začiatku (tam kde sme s ňou začali pliesť) a zalepíme ju dovnútra
Roll, which we braided to get to the beginning (where we started to knit with it) and glue it inside
8.) Pokračujeme tak, že 1. ruličku zastrčíme za 2. ruličku (ako na obrázku)
Continues with the first roll of a roll tucked under 2 (as shown)

 9.) Keď je to takto hotové tak 1. ruličku prestrčíme cez každú 2. medzeru (ako na obrázku)
When this is done as follows 1. roll inserted through each second gap (as shown)
10.) Ruličky začneme odstrihovaťStart cutting the rolls
11.) Teraz sa vrátime k úchytkom, ktoré tak isto odstrihneme
Now we return to the handle, which also cutoff
KOŠÍK JE HOTOVÝ :)
BASKET IS DONE :)
Najlepšie je ho ešte nafarbiť moridlom alebo iným lakom (ja som použila DEKORLAK - čerešňa)
The best is paint it with stain or other varnish (I use DEKORLAK - cherry)
Taktiež som si ušila aj látku do košíka, ktorú nájdete TU
I Also sewed the cloth to basket, which can be found HERE


0 comments:
Post a Comment